
Deep Litter Method for Chicken Coops
 By John Walker · Backyard chicken keeper in Dallas, Texas since 2017
The deep litter method for a chicken coop means building up a thick layer of dry bedding, turning it regularly, and letting it compost slowly in place, with a full clean-out only once or twice a year. Done well, it keeps the coop warmer in winter, cuts the weekly cleaning job, and produces compost for the garden; done badly, it turns into a damp, smelly mat that harms the birds.
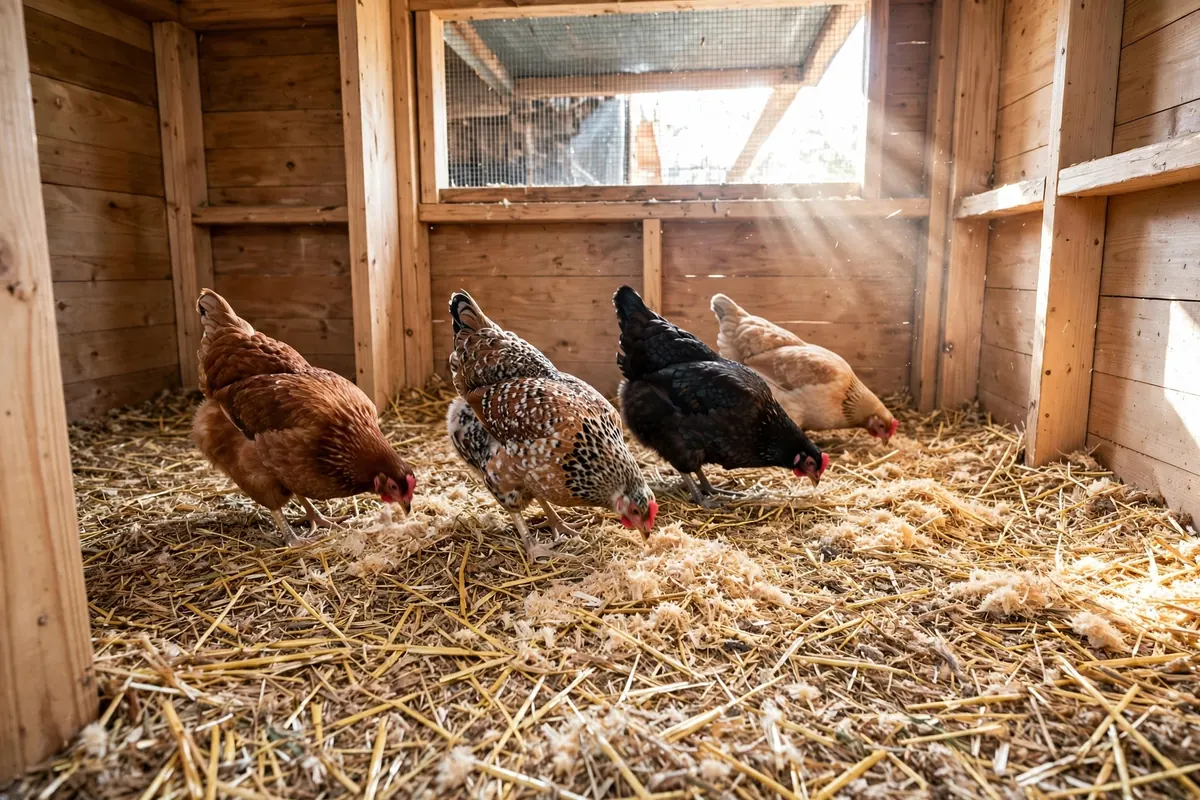
What is the deep litter method?
The deep litter method is a way of managing coop bedding in which you do not remove the bedding every week. Instead, you start with a layer of dry bedding about 4 to 6 inches deep, add fresh bedding on top as it becomes soiled, turn it regularly so air reaches the lower layers, and let the mixture compost slowly inside the coop. The droppings, the bedding and the microbes in the litter break down together, generating a small amount of heat and producing a friable, earthy material that, after months, is ready for the compost heap.
It is not neglect, and it is not the same as leaving a coop dirty. A deep litter coop is managed every week, just differently: the keeper turns the litter, adds dry material, checks the moisture, and watches for ammonia, rather than shovelling everything out. The difference from a standard clean-out system is the schedule: in a standard system the bedding is removed and replaced on a regular cycle, while in a deep litter system it is built up and turned, and removed only once or twice a year. The two systems are alternatives, and this guide covers deep litter; the standard clean-out schedule is the other system, and the two should not be mixed up in the same coop.
The method works best in a coop with a solid floor, good ventilation, and a roof that does not leak. It suits keepers who want less weekly cleaning, who want the compost the system produces, and who keep their birds in a coop that stays dry. It suits cold climates particularly well, because the composting litter gives off a little warmth and the deep bedding insulates the floor. It is a poor choice for a coop that leaks, for a coop with a dirt floor that stays damp, or for a keeper who will not turn the litter regularly.
Before you start, check that your coop can ventilate the ammonia the system produces. Use the Chicken Coop Ventilation Calculator to work out the ventilation your coop needs for your flock size, because deep litter without enough fresh air is the commonest way the method fails. Ventilation is not an optional extra for this system; it is part of it.
How deep should deep litter be?
Start deep litter at 4 to 6 inches deep, and build it up to 8 to 12 inches over the following months as you add fresh material. The starting layer needs to be deep enough to absorb droppings and to give the composting microbes somewhere to work, but not so deep that the birds cannot scratch through it. A layer shallower than about 4 inches dries out and does not compost; it just becomes soiled bedding that needs removing, which defeats the purpose.
Add fresh bedding in thin layers, an inch or two at a time, whenever the surface looks soiled or damp, rather than tipping in a large amount all at once. Thin additions mix with the droppings and the existing litter, and the birds' scratching helps turn them in. A large dump of fresh bedding on top of a wet layer seals the moisture underneath, where it turns anaerobic and starts to smell. Think of it as feeding the litter a little at a time, the way you would feed a compost heap.
The finished depth of 8 to 12 inches is a working range, not a rule to hit exactly. A small coop with few birds may settle at 8 inches, while a larger coop with a bigger flock may build to 12 inches before it needs a clean-out. What matters is the condition of the litter, not the measurement: it should be loose, dry on the surface, and earthy-smelling when you turn it. If it is compacted, wet, or smells of ammonia, depth is not the problem; moisture and turning are.
Keep the litter out of the nest boxes. Nest boxes need clean, dry bedding of their own, changed regularly, because eggs laid in soiled litter come out dirty and the hens will avoid a damp nest. The same applies to the area under the waterer: keep it on a raised platform or a wire stand so spills fall through rather than soaking the litter, and check it every day.
What bedding is best for deep litter?
Pine shavings are the best bedding for deep litter. They are absorbent, they break down at a useful rate, they are easy to turn, and they do not mat as readily as finer materials. Use large-flake shavings rather than fine sawdust, because sawdust packs down, holds moisture, and creates dust that irritates the birds' lungs. Straw can be used as part of the mix, and it adds structure that keeps the litter open, but straw alone is a poor deep litter bedding because it mats when wet and breaks down slowly.
Shredded leaves, dried grass clippings and chopped straw all work as additions to a pine shaving base, and they are a good use of garden material. Add them dry and in thin layers, and avoid anything that is already damp or mouldy. Hemp bedding is also used for deep litter and is very absorbent, but it is usually more expensive than pine shavings and is not available everywhere, so it is a choice rather than a requirement.
Never use cedar shavings in a chicken coop. Cedar gives off aromatic oils that irritate chickens' lungs and can damage their health, and the effect is worse in a deep litter system where the birds live close to the bedding for months. Never use newspaper, which is slippery, mats when wet, and does not absorb droppings. Never use treated wood shavings or shavings from wood that has been painted or chemically treated, because the chemicals end up in the litter and then in the compost.
Some keepers add a handful of food-grade diatomaceous earth or agricultural lime to the litter, and some add a scoop of garden soil to introduce the microbes that start the composting. Neither is essential. The droppings and the bedding supply the microbes, and the birds' scratching supplies the turning. If you do add anything, add it sparingly and on top of dry bedding, and do not use hydrated lime, which is caustic and can burn the birds' feet.
How to start deep litter in your coop
Start deep litter in a clean, dry coop, ideally in autumn or in dry weather, so the system has time to establish before the wettest season. Remove all the old bedding, sweep the floor, and let it dry completely. If the floor is concrete or wood, a thin scattering of agricultural lime or a layer of garden soil on the bare floor can help the composting start, but it is optional and the coop must be dry first.
Spread the first layer of pine shavings 4 to 6 inches deep over the whole floor, and add the birds. For the first few weeks, turn the litter with a fork every few days and add a thin layer of fresh shavings whenever the surface looks soiled. The litter should start to smell earthy rather than of droppings within a few weeks, and it should feel warm a few inches down when you push your hand into it. That warmth is the composting working, and it is a good sign, provided the surface stays dry and the air does not smell of ammonia.
Do not start deep litter in a coop that is already damp, and do not start it in the middle of a wet winter if the coop leaks. The system needs dry bedding to establish, and a wet start is hard to recover from. If the coop has a leak, fix the roof first. If the floor is bare earth that stays damp, deep litter is probably the wrong system for that coop, and a standard clean-out schedule with frequent bedding changes will serve the birds better.
Keep the waterer out of the litter from the start. Put it on a raised platform, a paving slab, or a wire mesh stand, and check daily for spills. A single leaking waterer can soak a deep litter bed in a day, and a soaked bed is the beginning of the end for the system. The same applies to rain blown in through a vent or a pop door: the litter must stay dry on the surface, and any source of water into the coop needs fixing before the litter can work.
How do you maintain deep litter week to week?
Turn the litter once a week, more often if the flock is large or the weather is wet. Use a garden fork to lift and turn the top few inches, breaking up any compacted patches and mixing the droppings into the bedding. Pay attention to the areas under the roosts, where droppings concentrate, and to the corners, where the birds do not scratch. The birds do some of the turning themselves by scratching, and scattering a little scratch grain on the litter encourages them to do more, but their scratching is not a substitute for a weekly turn with a fork.
Add fresh bedding whenever the surface looks damp or soiled, in thin layers of an inch or two. The surface should look dry and loose, and the litter should smell earthy, like a forest floor, when you turn it. If it smells of ammonia, add dry bedding and turn it, and check the ventilation that day. Ammonia is the warning sign that the system is out of balance, and it is also a health risk: ammonia at floor level irritates the birds' eyes and lungs, and it is one of the commonest causes of respiratory trouble in a coop.
Check the moisture by squeezing a handful of litter from a few inches down. It should feel damp, like a wrung-out sponge, but it should not drip water when squeezed. If it drips, the litter is too wet: add dry bedding, turn it, find the source of the water, and improve the ventilation. If it is dusty and dry all the way through, the composting has stalled: sprinkle a little water lightly over the surface, add a thin layer of fresh bedding, and turn it in. A deep litter bed that is too dry does not compost; it just accumulates droppings.
Remove any large, wet clumps that form under the roosts or around the waterer, rather than trying to turn them in. A clump of wet droppings and bedding will not break down in place; it will stay wet and smell. Scoop it out, add dry bedding in its place, and carry on. This is normal maintenance, not a failure of the system: even a well-run deep litter coop needs the worst clumps removed as they form.
Does deep litter smell?
A well-run deep litter coop smells earthy, like a garden compost heap, not like a chicken coop that needs cleaning. If the coop smells of ammonia or of sour, rotting bedding, something is wrong, and the cause is almost always moisture, poor ventilation, or litter that has not been turned. The smell is a diagnostic tool: it tells you what to fix, and it tells you quickly, before the birds suffer.
Ammonia smell means the litter is too wet, the ventilation is too low, or the litter has compacted and gone anaerobic. Fix it in that order: add dry bedding, turn the litter, and check the air flow. If the smell persists after a turn and fresh bedding, check the ventilation with the Chicken Coop Ventilation Calculator, and check for a leak or a spilling waterer. Do not mask the smell with a scented product; the ammonia is still there, irritating the birds, even if you cannot smell it.
A sour or rotten smell, different from ammonia, means the litter has gone anaerobic, usually because it is compacted and wet all the way through. Turn it thoroughly, add a large amount of dry bedding, and if the bed is soaked through, remove the worst of it and start the affected area again. A bed that has gone sour can sometimes be recovered, but a bed that is wet through and smells strongly after a week of turning and dry additions should be cleaned out and restarted, because the birds' health comes before the compost.
In summer, a deep litter coop can smell more than in winter, because heat speeds up the composting and the breakdown of droppings. Turn the litter more often in hot weather, keep the waterer from spilling, and make sure the ventilation is working at its best. If the coop smells in summer and the litter is dry and turned, the flock may simply be too large for the coop, and the answer is fewer birds or a bigger coop, not more bedding.
Is deep litter safe in summer?
Deep litter is safe in summer, provided it is kept dry and turned, and provided the coop is well ventilated. The composting in the litter does generate a little heat, which is welcome in winter and unhelpful in summer, but the heat from a well-managed bed is small compared with the heat from the birds themselves and from the sun on the roof. A coop that is too hot in summer is usually too hot because of the roof, the sun, or the lack of air flow, not because of the litter.
The main summer risk is moisture, not heat. Summer rain, spilled water, and humid air all add moisture to the litter, and warm, wet litter is the ideal breeding ground for flies and for the bacteria that cause disease. Keep the litter dry, turn it weekly, and remove wet clumps promptly, and the summer risk is manageable. If the litter stays wet despite your efforts, the coop may not be suitable for deep litter in a humid climate, and a standard clean-out system, with bedding removed and replaced regularly, may be the better choice for that coop.
Flies are the other summer concern. A dry, turned litter bed does not attract many flies, because the droppings are mixed into the bedding and dry out. A wet, compacted bed attracts them in numbers. If flies become a problem, the answer is to fix the litter, not to spray the coop: dry the bed, turn it, remove wet clumps, and make sure the waterer is not leaking. Fly traps outside the coop can help, but they do not fix a wet bed.
Some keepers clean out their deep litter in late spring, before the hottest weather, and restart the system in autumn. That is a reasonable variation: it gives the garden a load of compost in spring, and it means the coop runs on fresh bedding through the summer, when the composting heat is least wanted. If you choose that pattern, clean the coop thoroughly in spring, run a standard bedding schedule through the summer, and restart deep litter in autumn when the weather turns.
When and how do you clean out deep litter?
Clean out a deep litter bed once or twice a year, usually in spring and again in autumn, or once a year if the flock is small and the bed is in good condition. The signs that a clean-out is due are that the bed has reached 10 to 12 inches deep, that it no longer smells earthy when turned, or that it stays damp despite fresh bedding and turning. A bed that is working well can run for a year; a bed that is struggling should be cleaned out sooner, because the birds' health matters more than the compost.
To clean out, remove the birds to the run, then fork the litter into a wheelbarrow and carry it to the compost heap. The material at the bottom of the bed should be dark, crumbly and earthy-smelling, like finished compost. If it is wet, slimy or strongly smelling, it is not finished: add it to the compost heap and let it finish there, rather than spreading it directly on the garden. Sweep the floor, let it dry, and put down a fresh starting layer of 4 to 6 inches before the birds return.
The cleaned-out litter is valuable compost, but it is not ready to use straight away in every case. Fresh chicken manure is high in nitrogen and can burn plants, so the litter needs to finish composting before it goes on the garden. A bed that has composted in the coop for a year is usually well on the way, and a few more months on the compost heap finishes it. If you are unsure, compost it for a season and use it the following year; the garden will not mind the wait.
Between clean-outs, the system needs no deep clean of the floor, but the rest of the coop still needs attention. Clean the nest boxes regularly, scrub the waterer and feeder, check the roosts for mites, and clean the vents. Deep litter manages the floor, not the whole coop, and the other jobs do not go away because the floor is composting. Our guide on how to build a chicken coop covers the coop features, including ventilation and a solid floor, that make deep litter work.
Deep litter vs standard clean-out: which should you choose?
Deep litter and the standard clean-out are the two cleaning systems for a chicken coop, and the choice depends on your coop, your climate, and how you like to work. Deep litter means less weekly cleaning, a warmer coop in winter, and compost for the garden, but it needs a dry, well-ventilated coop, a weekly turn, and a keeper who watches the moisture and the smell. The standard clean-out means the bedding is removed and replaced on a regular schedule, which is simpler to understand, works in any coop including a damp one, and gives you a clean floor every time, but it means more frequent heavy work and more bedding used over the year.
Choose deep litter if your coop has a solid, dry floor, good ventilation, and a roof that does not leak, and if you are willing to turn the litter weekly and check it by smell and by squeeze. Choose the standard clean-out if your coop is damp, if the floor is bare earth, if you keep a small flock and prefer a simple weekly routine, or if you have tried deep litter and it kept going wet. Neither system is a sign of a better keeper; the right system is the one that keeps the coop dry and the air clean in your coop, in your climate.
Do not run both systems at once in the same coop. A coop that is half deep litter and half clean-out is a coop where the deep litter never establishes, because the bedding is removed before it can compost, and the clean-out never happens properly, because the bedding is left too long. Pick one system, run it properly for a season, and change only if it is not working. If you change, clean the coop out completely and start the new system from a dry floor, rather than trying to convert a half-used bed.
| Deep litter | Standard clean-out | |
|---|---|---|
| Full clean-out | Once or twice a year | Every few weeks, or as scheduled |
| Weekly work | Turn litter, add thin layers | Remove soiled bedding, replace |
| Bedding use | Less over the year | More over the year |
| Winter warmth | A little composting warmth | None from the litter |
| Compost | A large load once or twice a year | Smaller loads, more often |
| Needs | Dry coop, good ventilation, weekly turning | Works in any coop |
| Main risk | Wet, ammonia-smelling bed | More labour and bedding |
The two systems are alternatives. Pick one and run it properly for a season before judging it.
Sources: the deep litter figures on this page — a starting depth of 4 to 6 inches, building to 8 to 12 inches, and a full clean-out once or twice a year — are the planning values used across PeckCalc and are consistent with extension guidance on litter management. For coop ventilation and litter, see the poultry pages at the poultry.extension.org and the University of Minnesota Extension.
Related tools and guides
For more on the same topic, see How to Build a Chicken Coop and Chicken Coop Size by Flock Size.
Frequently asked questions
How deep should deep litter be?
Start deep litter at 4 to 6 inches deep and build it up to 8 to 12 inches over the following months, adding fresh bedding in thin layers of an inch or two at a time. The litter should be loose, dry on the surface and earthy-smelling when turned.
Does deep litter smell?
A well-run deep litter coop smells earthy, like a compost heap, not like a dirty coop. An ammonia smell means the litter is too wet, the ventilation is too low, or the litter has compacted and gone anaerobic, and it needs dry bedding, turning and better air flow that day.
Is deep litter safe in summer?
Yes, deep litter is safe in summer if it is kept dry and turned and the coop is well ventilated. The main summer risk is moisture, not heat: warm, wet litter attracts flies and breeds bacteria, so keep the waterer from spilling and remove wet clumps promptly.
How often do you clean out deep litter?
Clean out a deep litter bed once or twice a year, usually in spring and again in autumn. Clean it sooner if the bed has reached 10 to 12 inches deep, no longer smells earthy when turned, or stays damp despite fresh bedding and turning.
What bedding is best for deep litter?
Pine shavings are the best bedding for deep litter: absorbent, easy to turn, and slow to mat. Use large-flake shavings, not fine sawdust. Never use cedar shavings, which irritate chickens' lungs, or newspaper, which mats when wet.
About the author
John Walker is the founder of PeckCalc and has kept backyard chickens in Dallas, Texas since 2017. He started PeckCalc to give backyard keepers free calculators and guides with every figure traced to a university extension source.