
How to Check Chickens for Mites and Lice
 By John Walker · Backyard chicken keeper in Dallas, Texas since 2017
Learning how to check chickens for mites and lice is one of the most useful skills a backyard keeper can have, because these tiny parasites are common, hard to see, and easy to miss until the flock is already struggling. Mites and lice are both small insects that live on chickens, but they behave differently: lice live on the bird all the time, while many mites hide in the coop by day and feed on the birds at night. A bird with a heavy parasite load may lay fewer eggs, lose feathers, look pale, and grow weak, and chicks can even die. The good news is that a careful check takes only a few minutes per bird, needs no special equipment, and catches the problem early, when it is easiest to fix. This guide explains where to look, what to look for, and how often to check.
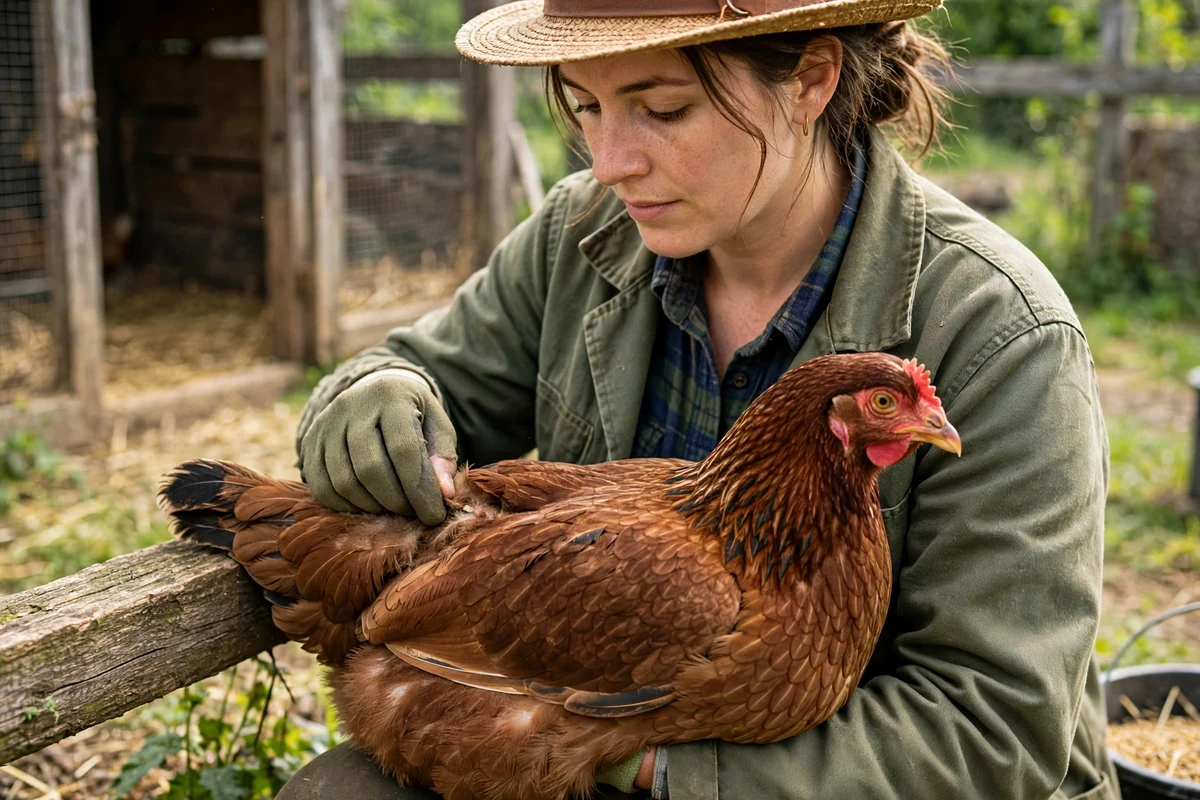
How to check chickens for mites and lice: the quick routine
How to check chickens for mites and lice starts with timing: check at night or in the early evening, when the birds are calm on the roost and easy to handle. Lift each bird gently from the roost and hold it under your arm with one hand free, or ask a helper to hold the bird while you look.
Work in good light, and use a torch if you are checking in the evening, because mites and lice are small and easy to miss in dim light. A check of the whole flock takes about fifteen minutes once you know what to look for.
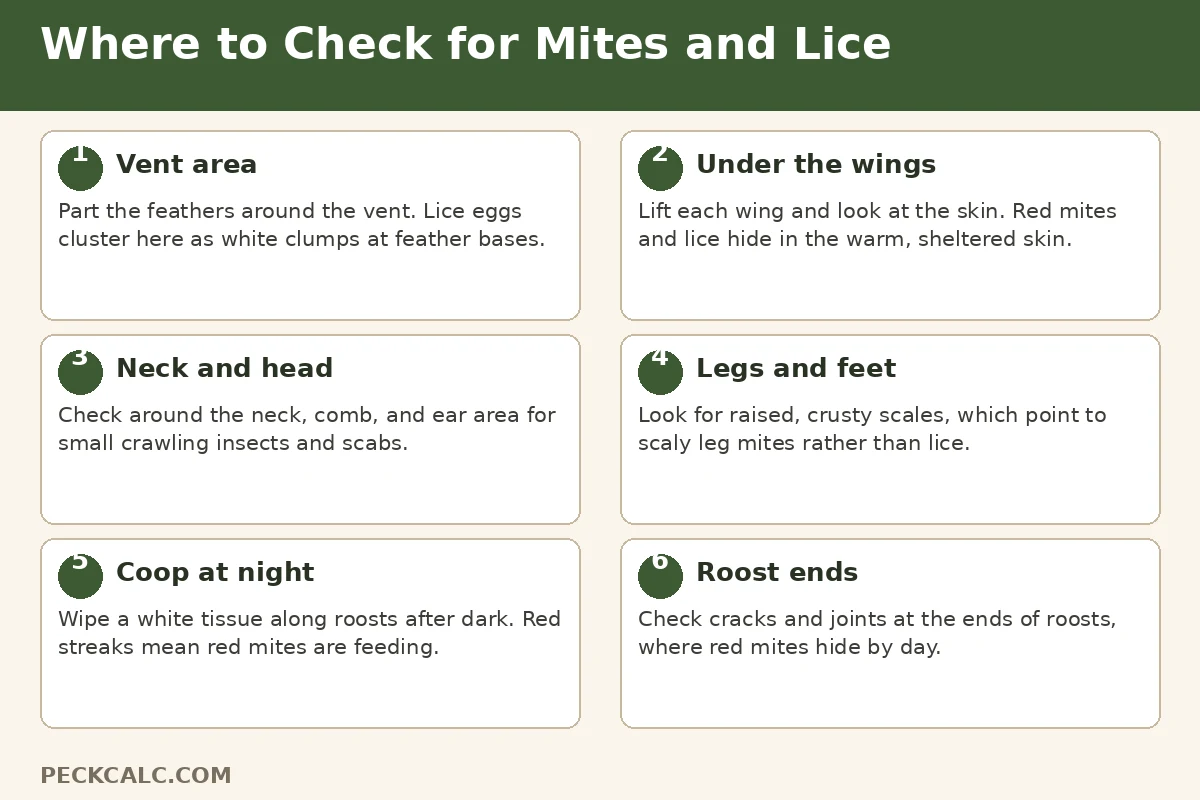
Start at the vent, which is the single most important place to check. Part the feathers around the vent and look at the skin and the base of the feathers. Lice lay their eggs, called nits, in white clusters at the base of the feathers near the vent, and a heavy infestation looks like white dust or clumps stuck to the feather shafts. Adult lice are small, pale, flat insects that move slowly through the feathers, and they are easier to see on the skin than on the feathers. If you see white clusters or small crawling insects, the bird has lice.
Next, lift each wing and look at the skin underneath, then part the feathers on the neck and around the head. Northern fowl mites are tiny, dark red or black specks that move fast, and they are often found around the vent and under the wings. Red mites are also dark and fast, but they are usually found in the coop rather than on the bird, which is why the coop check matters too. Take your time, and check the legs and feet last, looking for raised or crusty scales that point to scaly leg mites.
Mites vs lice: how to tell them apart
Mites and lice look similar at first glance, but they behave differently, and telling them apart matters because the treatment is different. Lice are pale, flat insects that live on the bird all the time, and they feed on feathers and skin debris rather than blood.
They move slowly, they are easy to see with the naked eye, and their white egg clusters at the base of the feathers are the clearest sign. Lice do not leave the bird, so if you find lice on one bird, you will usually find them on the others too.
Mites are smaller, darker, and faster than lice, and most kinds feed on blood. Northern fowl mites live on the bird all the time, like lice, but they are dark red or black and they move quickly when you part the feathers. Red mites, also called poultry red mites, are the tricky ones: they hide in cracks in the coop during the day and come out at night to feed on the birds, then return to the coop before morning. That means a bird can have red mites even if you find nothing on it during the day, and the coop check is the only way to catch them.
Scaly leg mites are a third kind, and they live under the scales on the legs and feet, causing the scales to lift and turn crusty. They are too small to see, so you diagnose them from the damage, not from the insect itself. Knowing which parasite you have matters because red mites need the coop treated as well as the birds, while lice and northern fowl mites are treated mainly on the birds. If you are unsure, take a photo of what you find and compare it with the descriptions in our treatment guides.
The white-tissue test for red mites
The white-tissue test is the best way to check for red mites, because these mites hide in the coop by day and are hard to find on the bird. Wait until after dark, when the birds have been on the roost for an hour or more, and take a white tissue or a white paper towel into the coop.
Wipe the tissue firmly along the underside of the roost, around the joints where the roost meets the wall, and along any cracks in the wood near the roost. Then look at the tissue in good light.
If the tissue shows red or brown streaks, or tiny red dots that smear when you press them, you have red mites. The red colour is blood from the birds, because the mites feed at night and are full of blood when you wipe them off the roost. A heavy infestation will leave clear red smears, while a light one may show only a few specks, so repeat the test on a few nights if you are unsure. The test is quick, free, and reliable, and it is the standard check that vets and extension services recommend.
You can also check the ends of the roosts in daylight, by looking into the cracks and joints with a torch. Red mites cluster in these hiding places as grey or red dust, and a heavy infestation is visible as a grey mass in a crack. Tap the roost and watch for tiny red specks that run away from the light. If you find red mites in the coop, the whole coop needs treating, not just the birds, because the mites spend most of their lives in the woodwork.
Signs of mites and lice in the flock
The first sign of a mite or lice problem is often a drop in egg laying, because birds that are losing blood or are irritated by parasites put less energy into laying. A bird with a heavy load may look pale around the comb and wattles, because blood loss causes anaemia, which is a low level of red blood cells.
The bird may also look dull, sit hunched, and eat less, and it may lose weight over a few weeks. These signs are easy to miss, which is why a regular check matters more than waiting for symptoms.
Feather damage is another common sign, and it can be confused with feather pecking. Birds with lice or mites preen constantly, pull at their feathers, and may lose feathers around the vent, neck, and under the wings. The skin underneath may look red, irritated, or scabby, and in severe cases the bird may have bare patches. Chicks are at the highest risk, because a heavy mite load can weaken a chick quickly, and a chick that is pale, cold, or slow to grow should be checked for parasites first.
Behaviour changes are also a clue. Birds with red mites may refuse to roost at night, because the mites bite them on the roost, and they may sleep in the nest boxes or on the floor instead. Birds with lice may spend more time dust bathing than usual, because dust bathing helps control parasites, and a sudden increase in dust bathing can be a warning sign. If several birds show these signs at once, check the whole flock the same evening, and do not wait for the problem to get worse.
How often should you check chickens for mites and lice?
Check your flock once a month as a routine, and more often in warm weather, when mites and lice breed fastest. A monthly check takes only a few minutes per bird, and it catches problems before they become serious. Check new birds before you add them to the flock.
And keep them apart from the flock for two weeks, because new birds are the most common way parasites arrive.
A new bird that looks healthy can still carry lice or mites, so the check is not optional.
Check the coop at night once a month as well, using the white-tissue test, because red mites can build up in the coop without any visible sign on the birds. Check more often if you have had mites before, because a coop that has had red mites is likely to have them again, and the mites can survive for months without feeding. After treating a flock, check again after one week and again after two weeks, because most treatments kill the adults but not the eggs, and a second check catches the new hatchlings before they breed.
In winter, mites and lice are less active, but they do not disappear, and a winter check is still worth doing. Birds spend more time in the coop in winter, which makes it easier for parasites to spread from bird to bird, and a heavy winter load can weaken a bird just when it needs its strength for the cold. A quick monthly check all year round is the simplest and cheapest way to keep parasites under control, and it is far easier than treating a flock that has been infested for months.
What to do if you find mites or lice
If you find mites or lice, do not panic, because the problem is common and treatable, but do act the same day. Isolate the worst-affected birds if you can, and treat the whole flock, not just the birds you checked, because parasites spread fast and birds that look clean may already be carrying them.
Read our guide on how to treat mites and lice in chickens for the full treatment steps, including which products to use and how to treat the coop as well as the birds.
Clean the coop thoroughly before you treat it, because dust, droppings, and old bedding protect the mites and make treatment less effective. Remove all the bedding, scrub the roosts and nest boxes, and pay special attention to cracks and joints where red mites hide. Replace the bedding with fresh, dry material, and treat the coop and the birds on the same day, so the mites have nowhere to hide. Repeat the treatment after seven to ten days, because the eggs hatch after the first treatment and the new mites need to be killed before they lay eggs of their own.
Keep checking the flock for two weeks after treatment, and do not assume the problem is gone because the birds look better. Mites and lice can survive in small numbers and build up again, so a follow-up check is part of the treatment, not an extra. If the problem comes back after two rounds of treatment, ask a vet for advice, because the product may not be working, or the mites may be a kind that needs a different approach. And remember that prevention is easier than treatment: regular checks, clean bedding, and dust bathing areas keep parasite numbers low all year.
Dust bathing and prevention
Dust bathing is the birds' own way of controlling parasites, and a good dust bath is the best prevention you can offer. A dust bath is a shallow pit or box filled with dry, fine dust, and the birds roll in it, working the dust into their feathers.
The dust smothers small insects and dries out their bodies, and birds that dust bathe regularly carry fewer parasites than birds that cannot. Give the flock a dust bath area that stays dry, under cover if possible, and top it up with fresh dust or wood ash when it gets low.
Wood ash from a fire, mixed with dry soil or sand, is a traditional dust bath material, and it works well because it is fine and dry. Diatomaceous earth is also sold for dust baths, but it should be used with care, because the fine dust can irritate the lungs of both birds and keepers if it is used in large amounts in a closed space. A simple mix of dry soil, sand, and a little wood ash is enough, and the birds will use it every day if it is dry and easy to reach.
Prevention also means keeping the coop clean and dry, because mites and lice thrive in dirty, damp bedding. Change the bedding regularly, keep the waterer from spilling, and make sure the coop is well ventilated. Quarantine new birds for two weeks, and check them for parasites before they join the flock, because new birds are the main way parasites arrive. A monthly check, a dry dust bath, and a clean coop together keep mite and lice numbers so low that treatment is rarely needed.
Common mistakes when checking for mites and lice
The most common mistake is checking only in daylight, because red mites are in the coop by day and on the birds at night, so a daytime check misses them completely. Always do the white-tissue test at night if you suspect red mites, and check the coop as well as the birds.
The second mistake is checking only one bird, because parasites spread through the flock, and a bird that looks clean may be carrying a light load that will build up over time.
Another mistake is confusing lice eggs with dirt or dandruff, because the white clusters at the base of the feathers can look like dust. If you are unsure, look closely: lice eggs are stuck firmly to the feather shaft and do not brush off, while dirt and dust brush away easily. A final mistake is treating the birds but not the coop, because red mites live in the coop, and treating only the birds leaves the mites in the woodwork ready to feed again the next night.
Sources: poultry.extension.org.
Related tools and guides
Finding parasites is only the first step: the treatment guide below explains how to treat the birds and the coop together.
Frequently asked questions
How to check chickens for mites and lice at night?
Lift each bird from the roost after dark and part the feathers around the vent, under the wings, and on the neck, looking for small crawling insects or white egg clusters. Then wipe a white tissue along the roosts: red or brown smears mean red mites are feeding. Check the whole flock, not just one bird.
What do chicken lice eggs look like?
Lice eggs, called nits, look like small white clusters stuck firmly to the base of the feathers, usually around the vent. They do not brush off like dust. Adult lice are small, pale, flat insects that move slowly through the feathers.
How can I tell mites from lice on chickens?
Lice are pale, slow, and live on the bird all the time, with white egg clusters at the feather bases. Mites are smaller, darker, and faster, and they feed on blood. Red mites hide in the coop by day and feed at night, so a night-time white-tissue test is needed to find them.
How often should I check my chickens for mites and lice?
Check the flock once a month, and more often in warm weather when parasites breed fastest. Check new birds before they join the flock, and check again one and two weeks after any treatment, because most treatments kill adults but not eggs.
Do chickens with mites stop laying eggs?
Yes, a heavy mite or lice load often causes a drop in egg laying, because the birds lose blood, feel irritated, and put less energy into laying. Pale combs, feather loss, restless behaviour at night, and birds refusing to roost are other common signs.
About the author
John Walker is the founder of PeckCalc and has kept backyard chickens in Dallas, Texas since 2017. He started PeckCalc to give backyard keepers free calculators and guides with every figure traced to a university extension source.